Root your Gingerbread Xperia X10 [Tutorial]
It has been just over a month since Android 2.3.3 Gingerbread started rolling out on the Sony Ericsson Xperia X10. We still get many questions asking us how to root the handset so we thought we’d knock together this quick guide that should cover the process in step-by-step detail.
We’ve adopted this method from xda-developer masterminds aZuZu and DooMLoRD. It also uses the FlashTool created by Bin4ry & Androxyde. Read the instructions in full carefully before applying each process. You need to be on stock Android 2.3.3 for this method to work.
Guide to Root your Gingerbread Xperia X10
Preparatory steps
– Download FlashTool (version 0.2.9.1) from here. Double click to extract and install the files. The FlashTool can be started by double-clicking X10FlashTool.exe.
– Enable Unknown Sources (Menu -> Settings -> Applications -> Unknown Sources) & USB debugging (Menu -> Settings -> Applications -> Development -> USB Debugging) on your Xperia X10.
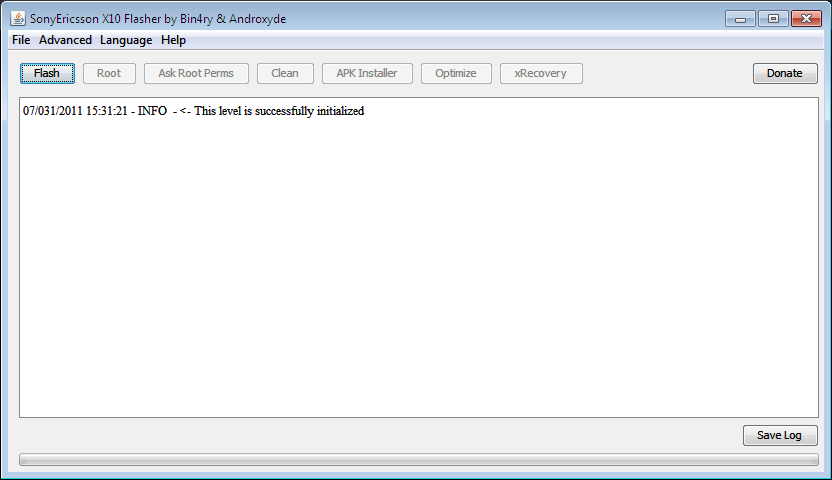
1) Start FlashTool [Make sure your Xperia X10 is not connected to your PC]
Start FlashTool by double-clicking X10FlashTool.exe in the folder where you extracted the files. Then press the ‘Flash’ button on the top left.
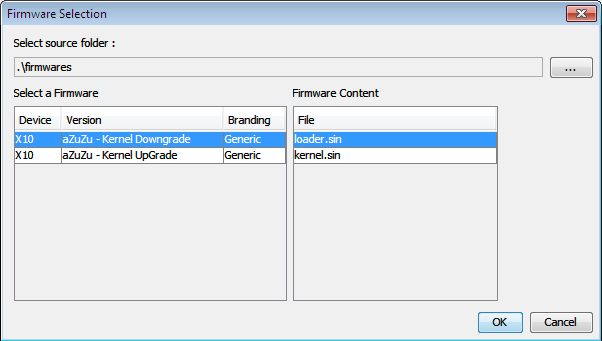
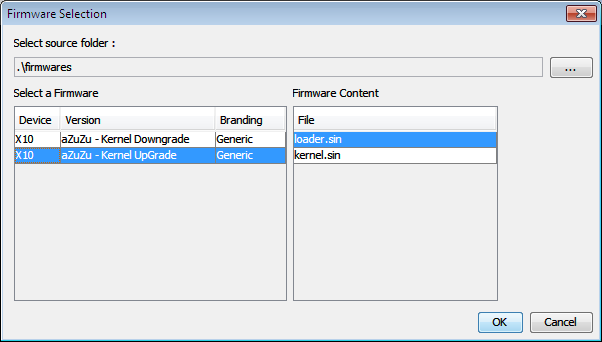
2) Kernel Downgrade
Highlight ‘aZuZu – Kernel Downgrade’ and make sure that under Firmware Content, ‘loader.sin’ is highlighted. Click OK.
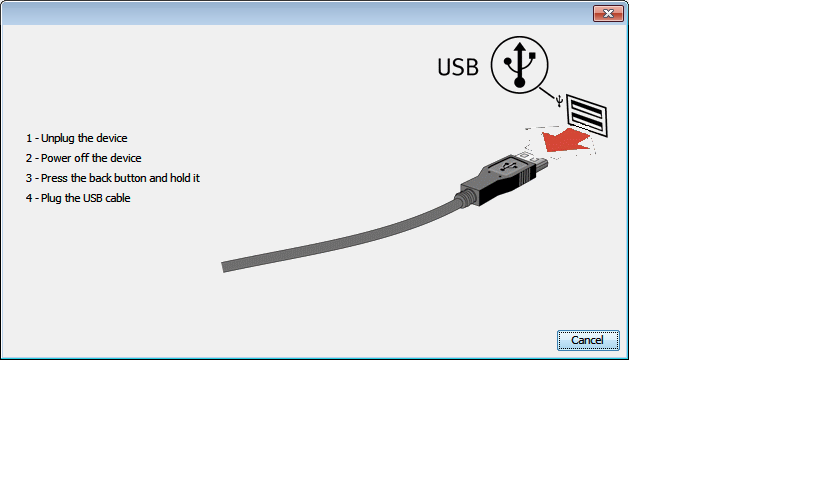
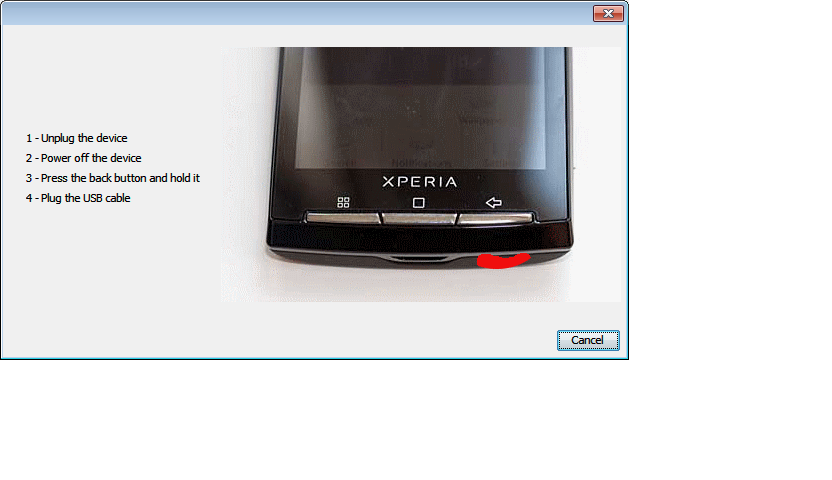
3) Plug in handset
As per the instructions below, make sure your handset is powered down. Then hold the ‘Back’ button on the handset whilst plugging in the USB cable.
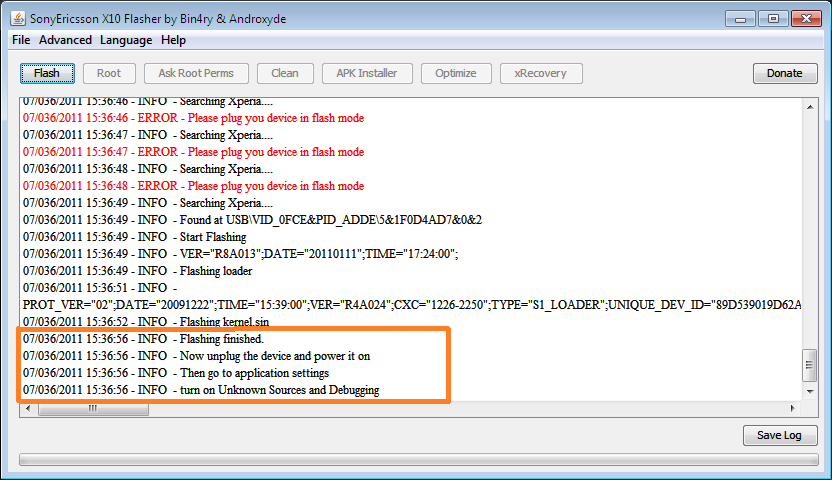
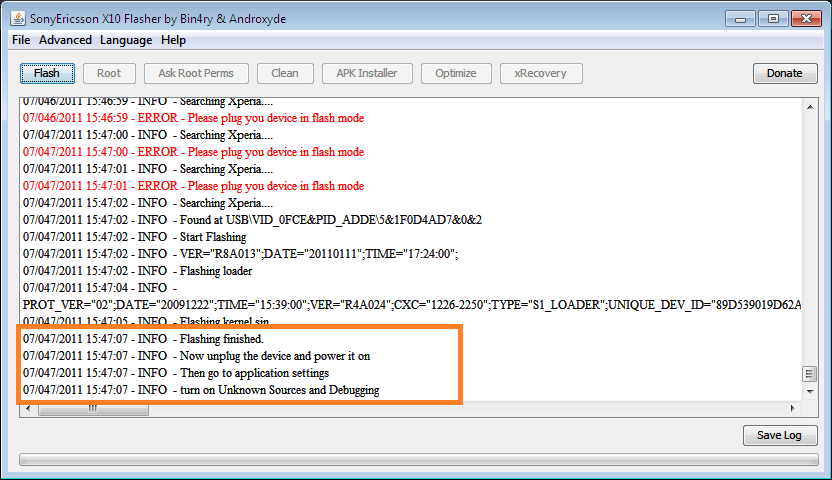
4) Flashing process
The handset will then be flashed and you should see an output as seen below. Remove the USB cable but keep Flashtool running.
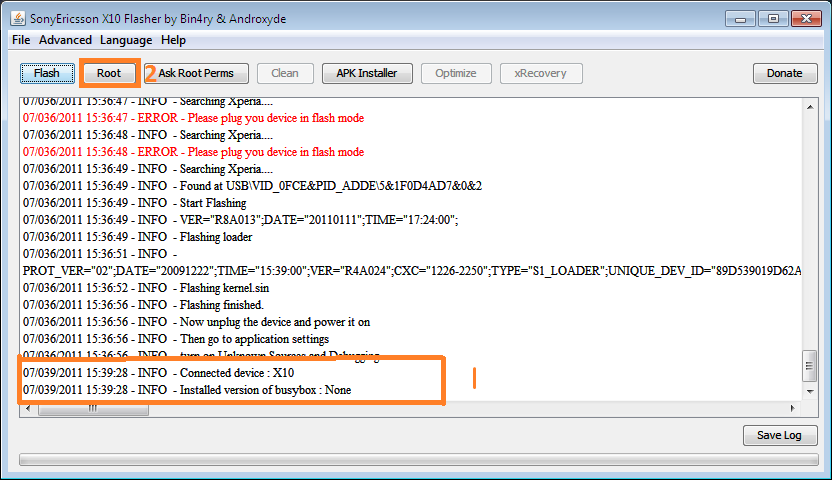
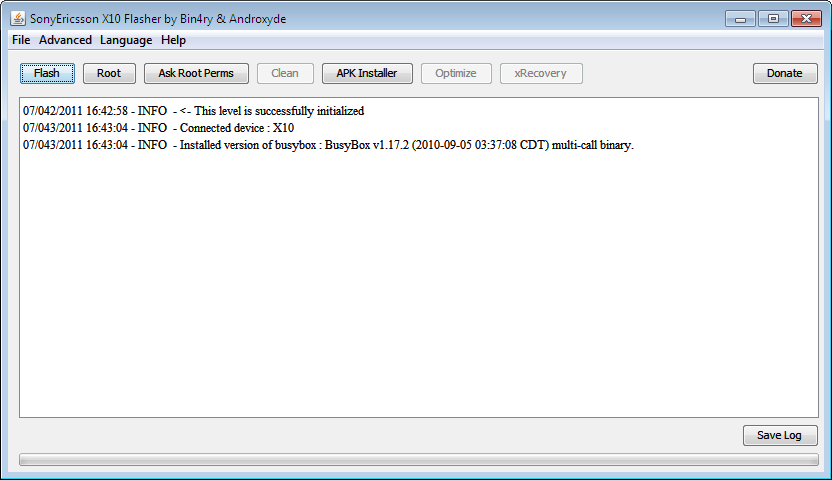
5) Root device
Now disconnect the Xperia X10 (keep FlashTool running). Power on the device and as soon as you feel the vibration, re-connect the X10 via USB. You will then see the output as indicated by number 1 below.
Once that has been completed press the Root button (indicated by number 2 in the picture below).
Once the device is rooted you will see the output as per below. Keep the phone connected as the phone will then reboot.
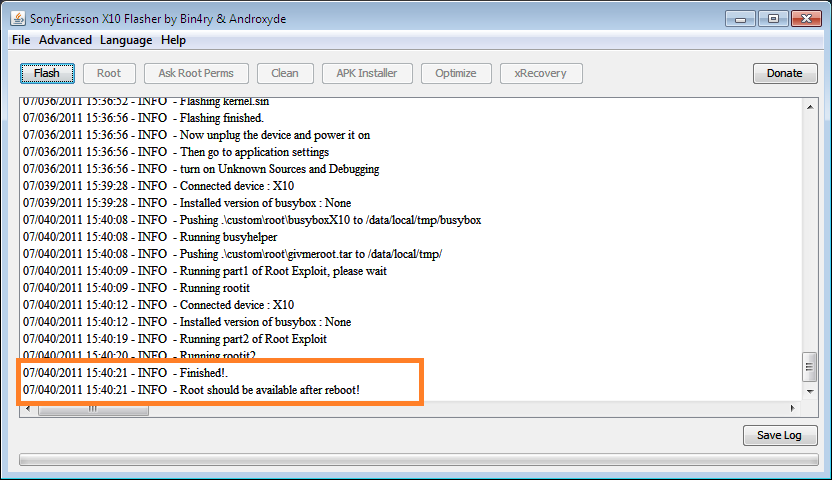
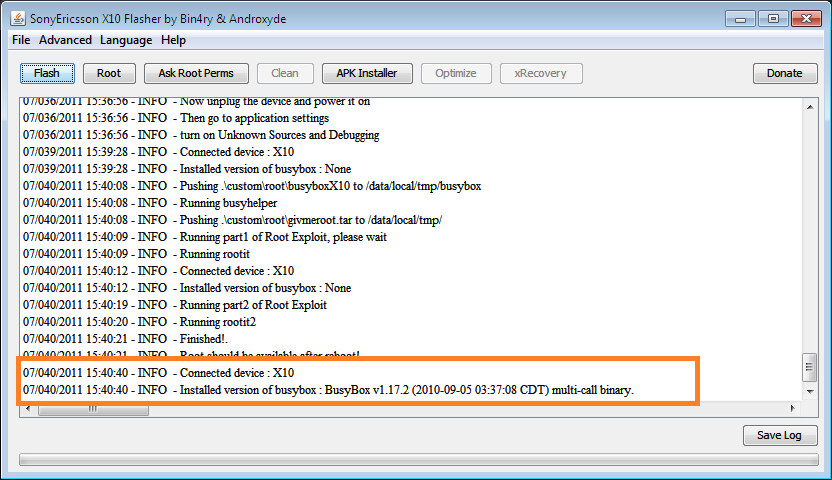
Once you see the messages that the X10 is connected, disconnect the handset and take the battery out for 30 seconds.
6) Upgrade Kernel
Now you need to upgrade the kernel, so press the ‘Flash’ button on the top left of the FlashTool. Select the bottom firmware and press OK.
The message to connect your X10 will come up again. Make sure the X10 is powered off, then whilst holding the back button connect it to your PC via USB.
The FlashTool will then complete the flashing process and when you see the output below you can remove the USB cable and power on your Xperia X10.
7) Success!
If you connect it to FlashTool again you will see the message below. Congratulations, your phone should now be rooted.
ไม่มีความคิดเห็น:
แสดงความคิดเห็น